Opening an oyster shell can be a daunting task for those who have never done it before. However, with a little practice and the right tools, it can be a fun and rewarding experience. In this article, I will share some tips and techniques on how to open an oyster shell with ease.
Before we dive into the details, it’s important to note that oysters can be eaten raw or cooked, and are often served as a delicacy in restaurants. When opening an oyster shell, it’s important to handle it with care to avoid injury and to preserve the quality of the meat inside. It’s also important to note that oysters can be different sizes and shapes, so there is no one-size-fits-all approach to opening them.
In the following sections, I will describe some common methods for opening oyster shells, including shucking, freezing, and oven roasting. Each method has its own benefits and drawbacks, so it’s important to choose the one that works best for you. With a little practice and patience, you’ll be opening oysters like a pro in no time.
Understanding Oysters
As someone who enjoys eating oysters, I find it fascinating to learn more about these creatures. Oysters are bivalve mollusks that live in saltwater or brackish water. They are filter feeders, meaning they obtain their food by filtering water through their gills and trapping tiny particles such as plankton, algae, and other organic matter.
When purchasing oysters, it is important to choose fresh ones. Fresh oysters should be alive and tightly closed. If an oyster is open, it should close when tapped on the shell. If it remains open, it is likely dead and should be discarded.
It is also important to handle oysters properly to prevent contamination and foodborne illness. Always keep them chilled and avoid exposing them to warm temperatures. When shucking oysters, use a clean knife and work carefully to avoid injury.
Oysters are a delicacy enjoyed by many, and understanding their biology and proper handling can enhance the enjoyment of this culinary treat.
Necessary Tools for Shucking
Opening an oyster shell can be a messy and challenging task, but with the right tools, it can be a breeze. Here are some of the necessary tools for shucking oysters:
Oyster Knife
When you choosing an oyster knife, also known as an oyster shucker, is a specially designed knife with a short, sturdy blade and a pointed tip. The blade is used to pry open the oyster shell, while the tip is used to detach the oyster meat from the shell. When choosing an oyster knife, look for one with a comfortable handle that provides a good grip.
Towel
A towel is an essential tool for shucking oysters. It is used to hold the oyster firmly in place while you work on opening the shell. The towel also helps to protect your hand from the sharp edges of the oyster shell.
Protective Gloves
Protective gloves, such as mesh shucking gloves, are an optional but highly recommended tool for shucking oysters. These gloves provide an extra layer of protection for your hands and make it easier to grip the oyster shell.
Other Tools
Other tools that can be useful for shucking oysters include a small brush for cleaning the oyster shells, a bowl for collecting the oyster meat, and a lemon or mignonette sauce for serving.
In summary, to shuck an oyster, you will need an oyster knife, towel, and protective gloves (optional). These tools will help make the process easier, safer, and more enjoyable.
Preparation Before Shucking
Before shucking an oyster, there are a few things that need to be done in order to ensure that the process goes smoothly. Here are some important steps to take before shucking an oyster:
Clean the Oysters
It is important to scrub the oysters under cold, running water to remove excess salt water, dirt, and debris that may be clinging to the shell. Use a scrubby sponge or mesh cleaner to help with this process. This will help to ensure that the oysters are clean and ready to be opened.
Refrigerate the Oysters
It is best to keep the oysters refrigerated until you are ready to shuck them. This will help to keep them fresh and prevent any bacteria from growing. Store the oysters in the refrigerator on ice or in a bowl of cold water, making sure that they are not submerged.
Clean Your Cutting Surface and Tools
Make sure that your cutting surface and tools are clean and free of any debris or bacteria. Use a clean, sharp knife to shuck the oysters, and make sure that it is sanitized before use. Additionally, it is important to have a clean towel or cloth on hand to wipe your hands and the oysters as needed.
By following these simple steps, you can ensure that you are properly prepared to shuck an oyster. With a clean workspace, fresh oysters, and the right tools, you’ll be ready to enjoy this delicious seafood delicacy in no time!
The Shucking Process
Shucking an oyster is the process of opening the shell to reveal the delicate meat inside. The first step is to clean the oyster under cold, running water. Scrub the oyster with a scrubby sponge or mesh cleaner to help remove excess salt water, along with any dirt and debris that may be clinging to the shell.
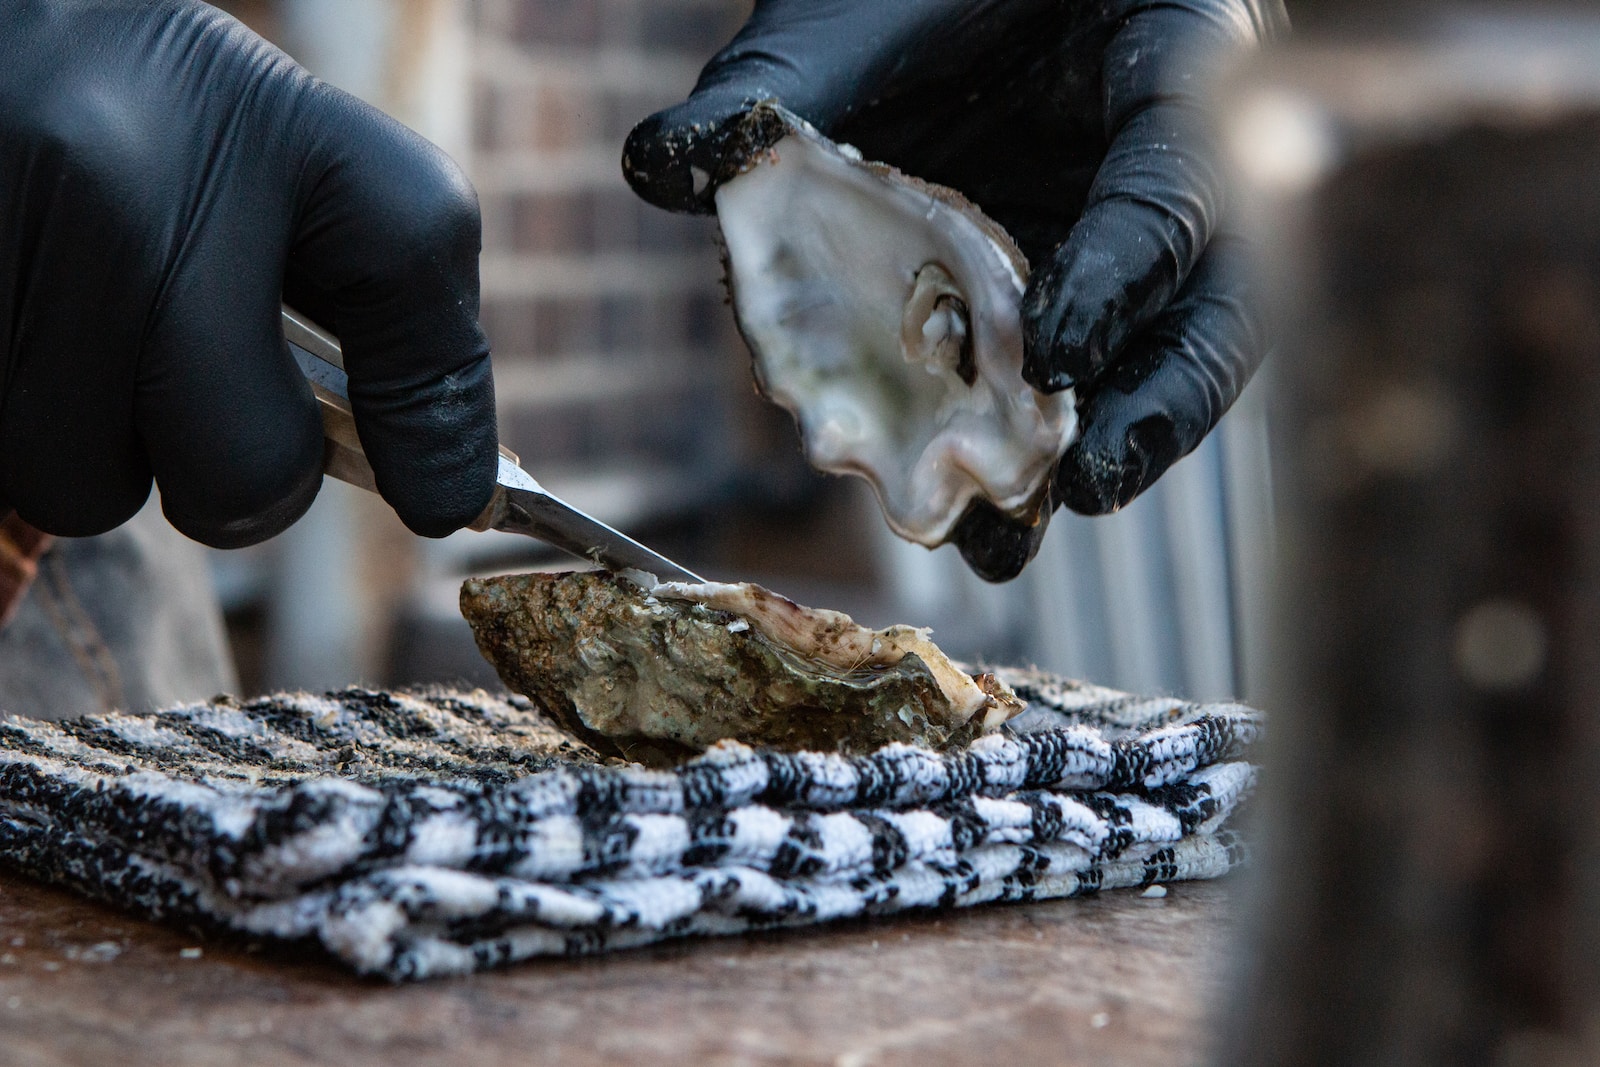
Next, find the hinge of the oyster. The hinge is the pointy end of the oyster where the two shells meet. Insert the tip of an oyster knife into the hinge and twist it to separate the shells. Be sure to wear a protective glove to avoid injury.
Once you have separated the shells, locate the adductor muscle. The adductor muscle is the muscle that holds the two shells together. Cut the adductor muscle with the oyster knife to release the lid of the shell.
After releasing the lid, slide the oyster knife underneath the oyster meat to detach it from the bottom shell. Be careful not to damage the oyster meat.
How to Open Oysters in a Video from Jamie Oliver
Finally, remove any debris or shell fragments from the oyster meat and serve. Oysters are best enjoyed fresh, so be sure to shuck them just before serving.
In summary, to shuck an oyster, you need to find the hinge, cut the adductor muscle, detach the oyster meat from the bottom shell, and remove any debris or shell fragments. With practice and proper technique, shucking oysters can be a quick and easy process.
Safety Measures During Shucking
As someone who has opened many oysters, I can tell you that safety is the most important aspect of shucking. Oysters can be quite dangerous if not handled properly, so it’s crucial to follow some basic safety measures.

Firstly, always use a shucking knife. Regular knives are not designed for this purpose and can easily slip, causing injury. A proper oyster knife has a short, sturdy blade with a pointed tip that can easily slide into the oyster’s hinge. Make sure the blade is sharp and in good condition before using it.
Next, protect your hand with a thick, clean towel or glove. Wrap the towel or glove around your non-dominant hand and hold the oyster firmly with the flat side facing up. This will help prevent the knife from slipping and injuring your hand.
It’s also important to keep your work area clean and free of debris. Oysters can harbor harmful bacteria such as Vibrio vulnificus, which can cause serious illness if ingested. Make sure to wash your hands thoroughly before and after handling oysters, and always shuck them on a clean surface.
Finally, if you’re new to shucking, consider taking a class or watching a tutorial online. Oyster shucking is a skill that takes practice to master, and learning from an experienced shucker can help you avoid common mistakes and stay safe.
By following these safety measures, you can enjoy delicious oysters without putting yourself or others at risk.
Storing Oysters
As an oyster lover, I know how important it is to store them properly to keep them fresh and safe to eat. Here are some tips on how to store oysters:
Keeping Oysters Alive
If you want to keep oysters alive, store them in a cool, dark place with good air circulation. You can use a cooler or a refrigerator to store them. Make sure the temperature is between 33 and 40 degrees Fahrenheit. Do not store them in water or ice, as it can kill them.
Storing Shucked Oysters
If you have shucked oysters, store them in a sealed container in the refrigerator. Make sure they are covered with their liquor or a damp cloth to keep them moist. They will stay fresh for up to two days.
Freezing Oysters
If you want to freeze oysters, first shuck them and remove any debris. Place them in an airtight container or freezer bag and cover them with their liquor. Then, freeze them for up to three months. When you are ready to use them, thaw them in the refrigerator overnight.
Checking for Freshness
Before you store oysters, make sure they are fresh. Check for any cracks or breaks in the shells. If the shells are closed, tap them lightly. If they close, they are alive and fresh. If they do not close, they are dead and should be discarded.
By following these tips, you can store oysters properly and enjoy them at their best.
Methods of Opening Oysters
When it comes to opening oysters, there are a few different methods you can use, depending on your preference and the tools you have available. Here are some of the most common methods:
Shucking Raw Oysters
Shucking raw oysters is the most traditional method of opening oysters. To do this, you’ll need an oyster knife, which is a short, sturdy knife with a pointed tip. First, scrub the oysters under cold, running water to remove any dirt or debris. Then, hold the oyster flat in one hand, with the hinge facing you. Insert the tip of the oyster knife into the hinge and twist it to pop the shell open. Then, slide the knife along the inside of the top shell to cut the muscle that connects it to the bottom shell. Finally, remove the top shell and use the knife to loosen the oyster from the bottom shell.
Grilling, Boiling, or Steaming Oysters
If you prefer to cook your oysters before opening them, there are several methods you can use. One option is to grill them. Simply place the oysters on a hot grill and cook them until the shells pop open, about 5-10 minutes. Another option is to boil them. Bring a pot of water to a boil, add the oysters, and cook for 3-5 minutes, until the shells pop open. Finally, you can also steam them. Place the oysters in a steamer basket over a pot of boiling water and steam for 5-10 minutes, until the shells pop open.
Using Other Tools
If you don’t have an oyster knife, or if you’re not comfortable shucking raw oysters, there are other tools you can use. Some people use a screwdriver or a butter knife to pry open the shells, while others use a specialized oyster shucking tool. These tools are designed to make it easier to open oysters without damaging the delicate meat inside.
Overall, there are many different methods you can use to open oysters, depending on your preference and the tools you have available. Whether you prefer to shuck them raw or cook them first, there’s a method that will work for you.
Serving Oysters
When it comes to serving oysters, presentation is key. Oysters should be served on a bed of crushed ice to keep them cold and fresh. This also makes for an attractive display.

Raw oysters can be served with a variety of sauces and mignonettes. Mignonette is a classic sauce made with shallots, vinegar, and pepper. It pairs perfectly with the briny flavor of raw oysters.
To make mignonette sauce, finely chop shallots and mix them with red wine vinegar and freshly cracked black pepper. Allow the mixture to sit for at least 30 minutes to allow the flavors to meld together. Serve the sauce chilled alongside the oysters.
Another popular sauce for raw oysters is cocktail sauce. Made with ketchup, horseradish, and Worcestershire sauce, it adds a tangy and spicy kick to the oysters.
When shucking oysters, it’s important to retain as much of the oyster’s juices as possible. These juices are a key component of the oyster’s flavor and should not be wasted.
In terms of recipes, there are countless ways to prepare oysters. They can be fried, grilled, baked, or even served in a stew. However, raw oysters are a classic and elegant way to enjoy this delicacy.
Overall, serving oysters is all about presentation and flavor. Keep them cold, serve them with a delicious sauce or mignonette, and enjoy the briny flavor of this ocean delicacy.

Cooking Oysters
When it comes to cooking oysters, there are a variety of methods to choose from, but one of the simplest and most delicious ways is to simply roast them in the oven with some garlic butter.
To prepare the oysters for cooking, make sure they are clean and free of any debris. Then, place them on a baking sheet with the deeper, cup-shaped side facing down. Sprinkle some coarse salt over the top of the oysters to help keep them steady and prevent them from tipping over during cooking.

Next, melt some butter in a small saucepan and add some minced garlic to it for flavor. Once the butter has melted and the garlic is fragrant, spoon some of the garlic butter over each oyster, making sure to distribute it evenly.
Place the baking sheet with the oysters in a preheated oven at 450°F and roast them for about 10-12 minutes, or until the oysters have opened slightly and the edges have begun to curl. Be careful not to overcook the oysters, as they can become tough and rubbery if left in the oven for too long.
Once the oysters are cooked, remove them from the oven and let them cool for a few minutes before serving. You can serve them on their own as a delicious appetizer, or pair them with some crusty bread to soak up the flavorful juices.
Overall, cooking oysters with garlic butter is a simple and tasty way to enjoy this delicious seafood. With just a few simple ingredients and some basic cooking techniques, you can create a dish that is sure to impress your guests and leave them wanting more.